

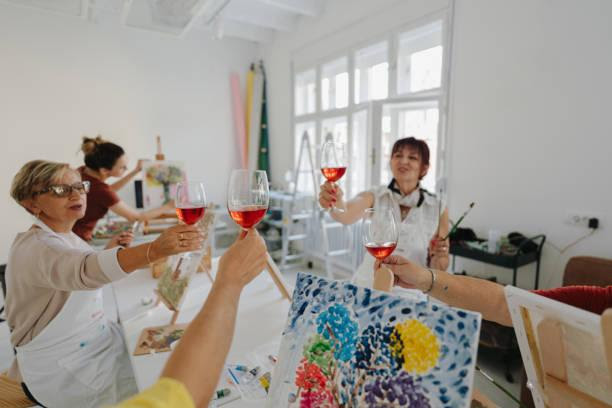
When I first heard about the notion of a paint and sip Gold Coast night (alternatively referred to as paint and sips, art parties, wine & canvas parties, etc), I admit that I shivered. Why would a group of individuals want to leave a painting class with the same artwork as twenty others?
However, the subject came up often in my own art classes, and I quickly entertained the notion of teaching one merely for the experience. I’d previously taught art classes using step-by-step paintings, so I assumed I was familiar with the format. Click here to read more about Paint and Sip in Gold Coast.
Tip 1: Draw inspiration from your own artwork.
Once I’ve established the day, time, and cost structure for my paint and sip Gold Coast class, I begin looking for the perfect painting to teach at the event. In my experience, it’s preferable to simplify one of my own paintings at a beginning pupil level.
Typically, I’ll peruse my own artwork on my website and then sketch over it on my phone using a stylus. I divide the painting into pieces and number them according to the sequence that I believe would function best throughout the session. (Alternatively, you can print a photo of the painting and sketch portions on paper.)
If this seems very similar to one of those old paint-by-number techniques, you are absolutely accurate! The majority of paint and sip Gold Coast participants will want to leave with a painting that looks just like yours, so make it simple for them by simplifying the painting and composition.
Additionally, you should avoid choosing a painting that requires sophisticated methods or abilities to complete (but more on that in Tip #3).
Tip 2: Paint it yourself, step by step, taking notes along the way!
I cannot emphasize this enough: the number one technique to properly teach a painting step-by-step to a novice level class is to paint it yourself ahead of time (sometimes several times) and determine precisely which stages are necessary.
When I arrange a paint and sip Gold Coast class, I try to complete the painting weeks in advance of the event. After deciding on a piece and simplifying it with numbered parts, I begin the trial painting process. I chronicle each stage of the process with photographs, reminders, color names, brush sizes, and painting suggestions. The more notes and photographs you have, the less space there will be for error on the day of the event.
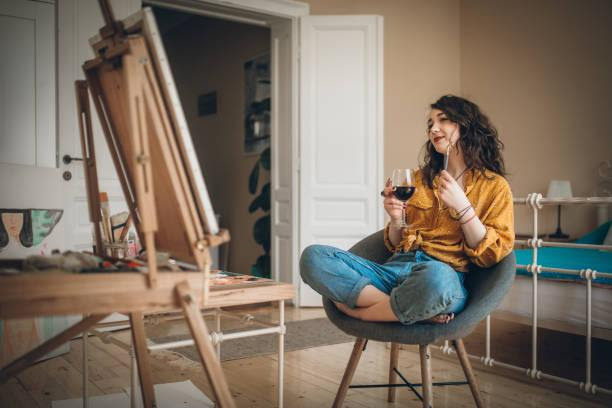
Many people who attend paint-sips are making their first painting in a class, and their anxiety level is frequently quite high. The majority of attendees simply want to experience the joy of painting alongside an experienced instructor. The more questions and needs you can anticipate in advance, the more smoothly the class will run.
Once you’re satisfied with the painting, compile your notes into a simple lesson plan with numbered steps for you to follow. Type or print it clearly, and, if possible, include some visual aids alongside each step (like a sketch or a photo next to its corresponding step). If you’re passing along a supply list to another party for the event, now is the time to include a detailed list of brands and colors. Visit https://angelfirevacationrental.com/diy-paint-and-sip-in-gold-coast/ to learn about DIY paint and sip in Gold Coast.
While you’re painting and planning, don’t forget to plan your timing—if it takes you an hour or so to complete a painting (even with all of the stopping and documenting), add an hour for your students.
Then, create a full-time schedule for the class itself, including some time for socializing at the start and a break before the class’s final hour or so. I usually plan my color palette with a large water change/brush cleaning in mind toward the final third of the painting time, which is a natural break time for people to get up and refresh their drinks and take a few steps back to inspect their paintings.
Changing water may appear to be a simple task, but when you add 25 people (and one sink), a small space, and wine, it becomes a big event!
Spending so much time planning may seem time consuming, but I can assure you that you will be grateful for the effort. As a former public school teacher, I quickly learned that the more complex my students’ needs were, the more planning I needed to do for my lessons (at any age level!). Having a well-thought-out plan in place also helps to alleviate any nervousness you may experience as you begin teaching your paint and sip Gold Coast class.
Tip 3: Instruct students in painting, not in how to be an artist.
While planning a paint and sip Gold Coast night, resist the temptation to teach the participants how to paint. That may seem strange given that they are attending a painting class, but the objective is to teach your class how to create one specific painting for one scheduled night—not art theory, composition, or technique, and certainly not your own artistic ability as a teacher.
Can you demonstrate a few tips and tricks to your students? Certainly! They’ll like discovering a few of an artist’s secrets. Simply limit yourself to one or two fundamental techniques and consider the remainder of the painting as “filling in” all of the sections.
You can still educate participants about brush names, specific colors and their complementary colors, and common mistakes to avoid. Simply remember to keep the focus on the painting steps and toss in the occasional art buzzword or technique tip for the curious.
If you’re teaching a painting that requires drawing, don’t be afraid to provide your students with paper stencils to use. Students who struggle with drawing will be extremely appreciative!
Additionally, keep in mind that your students may lack your unique artist muscles—while extensive brushing and blending may be pleasurable for you, it may be painful for participants whose arm and hand muscles are not as strong.
Tip 4: Arrive early and properly position yourself
D-Day has arrived! If you’re anything like me, you’ve anticipated the actual day with a mixture of excitement, curiosity, and anxiety.
Before you begin packing for the event, make a list of your supplies. Arrive early to ensure the room is set up optimally for the experience.
When arranging your space, put safety first: no food or beverage stations near the paint supplies! Assure that participants have enough space to move around without tripping or knocking things over. Allow space for walkers and wheelchairs if necessary. Arrange your demo area in such a way that everyone can see you clearly.
The more space you pre-arrange for participants, the smoother the transition will be when class begins. I like to set up a sample paint palette (which is frequently a paper plate) and have participants bring their own paints to the paint and sip Gold Coast venue.
Having a helper take over the distribution of pre-made palettes with paint is also beneficial (and limits wasted paint). With the painting spaces already set up with canvas, brushes, water, and paper towels, participants are free to pick up their paint palettes and claim their spaces before grabbing food and beverages and socializing.
Other article: Flowers Northbridge Fresh Bouquets for Any Event